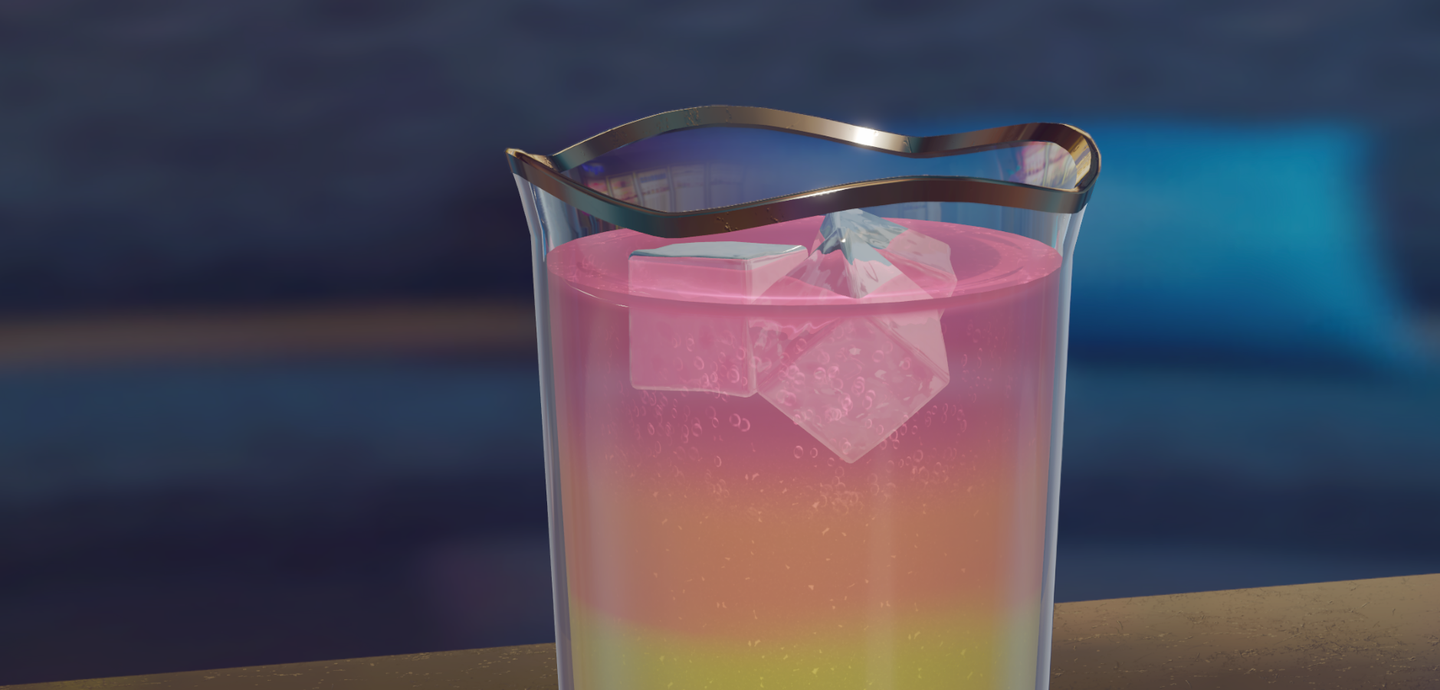

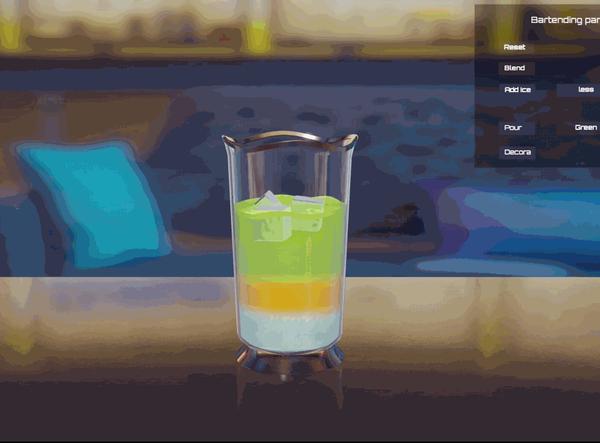
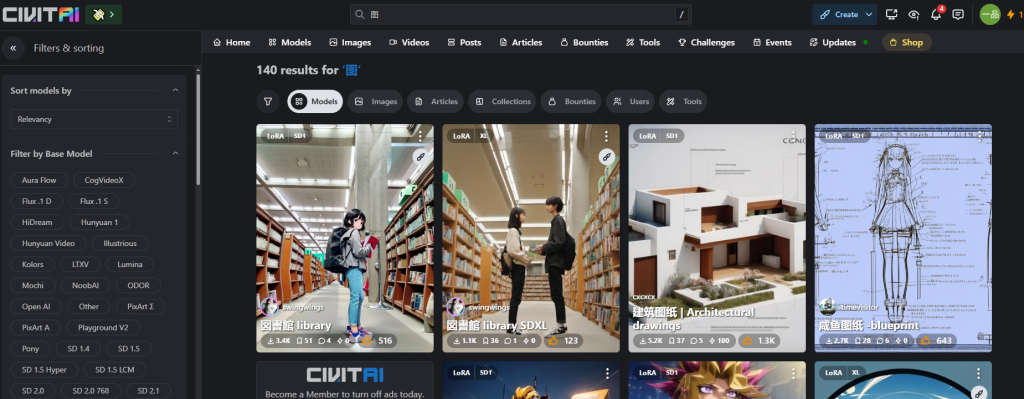
先放参考:
![图片[1]-【unity shader】复刻星穹铁道调酒效果 - 盘古CG网-盘古CG网](https://picx.zhimg.com/v2-45c554478521a2410edded4b3fb48f8c_r.jpg?source=172ae18b)
![图片[2]-【unity shader】复刻星穹铁道调酒效果 - 盘古CG网-盘古CG网](https://pica.zhimg.com/v2-db2917be35d31e18fbfe91843deeb913_r.jpg?source=172ae18b)
![图片[3]-【unity shader】复刻星穹铁道调酒效果 - 盘古CG网-盘古CG网](https://pic1.zhimg.com/v2-6dd90e253ce39f50bae0428ca9617924_r.jpg?source=172ae18b)
看了这个效果感觉很有意思,自己尝试了一下其中涉及到了挺多小细节,逛知乎法线大佬已经复刻过了这个效果~
本文的实现方式基本思路参考了@伊底1D 的 关于星穹铁道调酒效果(分层液体瓶)的复刻尝试。
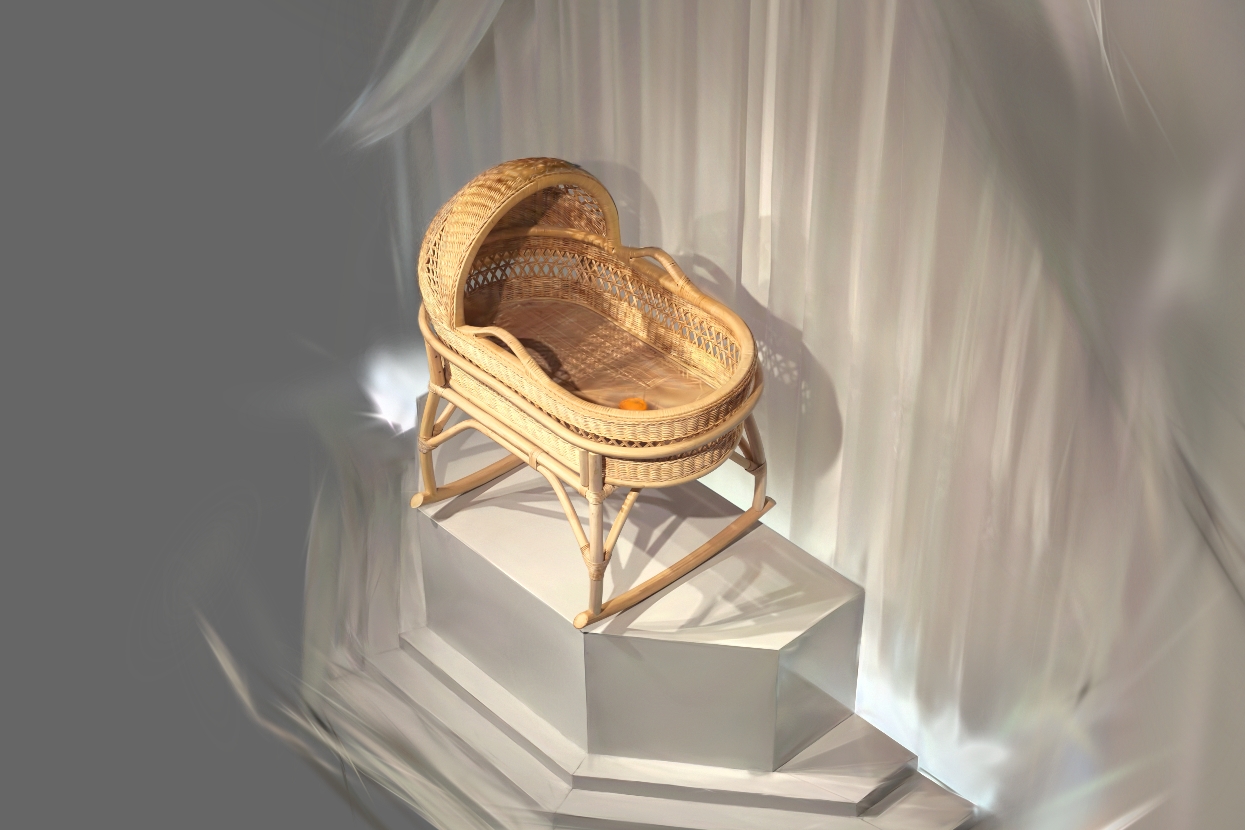
最终效果:
![图片[4]-【unity shader】复刻星穹铁道调酒效果 - 盘古CG网-盘古CG网](https://pic1.zhimg.com/v2-c1a65e5c812ac6772e31db3fd604f8d2_1440w.jpg)
![图片[5]-【unity shader】复刻星穹铁道调酒效果 - 盘古CG网-盘古CG网](https://pic1.zhimg.com/v2-b41e59acd154ba48c75b12defbaaec14.jpg?source=25ab7b06)
渲染顺序
![图片[6]-【unity shader】复刻星穹铁道调酒效果 - 盘古CG网-盘古CG网](https://picx.zhimg.com/v2-a94fcdd79cefb1990a88c2bd81965a9b_1440w.jpg)
![图片[7]-【unity shader】复刻星穹铁道调酒效果 - 盘古CG网-盘古CG网](https://pic3.zhimg.com/v2-0b5e0babd6d15644458a8750aeb16aae_1440w.jpg)
直接看drawcall 比较简单粗暴 先画液体正面再画液体背面,使用stencil遮罩假平面的深度, 画完液体 把color传入冰块做折射用(冰块不用透明度 深度可以放在颜色a通道可以少采一张图)
然后,在mergeshader对 _IceColorBuffer _LiquidColorBuffer _LiquidDepthBuffer SceneColor做混合,输出正确排序的颜色和深度
最后,再copy一张sceneColor给玻璃杯做折射用。。
// 采样
half4 iceColor = SAMPLE_TEXTURE2D(_IceColorBuffer, sampler_IceColorBuffer, input.texcoord);
half iceDepth = iceColor.a;
half4 liquidColor = SAMPLE_TEXTURE2D(_LiquidColorBuffer, sampler_LiquidColorBuffer, input.texcoord);
half liquidDepth = SAMPLE_TEXTURE2D(_LiquidDepthBuffer, sampler_LiquidDepthBuffer, input.texcoord).r;
// 混合颜色
half4 sceneColor = half4(SampleSceneColor(input.texcoord), 1.0);
// 冰块
half4 iceAndBackGround = lerp(sceneColor, iceColor, step(0.001, iceDepth));
// 冰块和液面交界高亮
half liquidDepth01 = Linear01Depth(liquidDepth, _ZBufferParams);
half iceDepth01 = Linear01Depth(iceDepth, _ZBufferParams);
half contactMask = smoothstep(liquidDepth01, liquidDepth01 + 0.00007, iceDepth01);
liquidColor.rgb = lerp(liquidColor.rgb * 1.5, liquidColor.rgb, contactMask);
half4 finalColor = lerp(iceAndBackGround * (1 - liquidColor.a) + liquidColor * liquidColor.a, iceAndBackGround, step(liquidDepth, iceDepth));
// 混合深度
depthOUT = lerp(liquidDepth, iceDepth, step(liquidDepth, iceDepth));
return finalColor;
数据结构
每一层酒的数据结构:
![图片[8]-【unity shader】复刻星穹铁道调酒效果 - 盘古CG网-盘古CG网](https://pic1.zhimg.com/v2-64f881ffd383306ba4307db499358a10_1440w.jpg)
Color: RGB颜色 A透明度
MaskTex: 每层酒的细节纹理,不赋值为黑色没有纹理
LerpRange:和下层酒之间的融合范围
BubbleInt:气泡强度
Lerp WarpInt:融合部分的扰动程度,越大融合部分噪声越强烈
LerpWarpSize:控制融合部分的噪声密集程度
manager脚本中维护这些数组,记录当前已有的数据,传递到shader
[SerializeField] private Color[] layerColors;
[SerializeField] private float[] layerLerps;
[SerializeField] private float[] bubbleInt;
[SerializeField] private float[] lerpWarpInt;
[SerializeField] private float[] lerpWarpSize;
...
private RenderTexture layerMaskTexArray;
液体
液体的模型就是杯子内壁的模型复制一份,分两个pass渲染,一次画正面一次画背面。
Pass
        {
            Name "Draw Front"
            Tags {"LightMode" = "SRPDefaultUnlit"}
            Stencil
            {
                Ref 1
                Comp Always
                Pass Replace
                ZFail Replace // 确保在被其他物体遮挡时也能写入模板值
            }
            Cull Back
            Blend One Zero
            ZWrite On
Pass
{
Name "Draw Back"
Tags {"LightMode" = "UniversalForward"}
Stencil
{
Ref 1
Comp NotEqual
Pass Replace
}
Cull Front
Blend One Zero
ZWrite On冰块
GPUInstance绘制冰块,将之前绘制的液体颜色传入冰块shader,在冰块shader中采样liquidColor 和sceneColor排序后做折射。
![图片[9]-【unity shader】复刻星穹铁道调酒效果 - 盘古CG网-盘古CG网](https://pic2.zhimg.com/v2-8b033eb34db3cecba524960974278a51_1440w.jpg)
iceMat.SetTexture(id_LiquidColorBuffer, handle_LiquidColor);
// Pass2 冰块 gpuinstance
using (new ProfilingScope(cmd, profilingSampler_Ice))
{
    if (iceMatrix != null && iceMatrix.Length > 0)
    {
        CoreUtils.SetRenderTarget(cmd, handle_IceColor, handle_IceDepth, ClearFlag.All);
        cmd.DrawMeshInstanced(iceMesh, 0, iceMat, -1, iceMatrix, iceMatrix.Length);
    }
}
液面
虚拟平面
通过平面射线相交来模拟液体表面
根据
平面方程 n * (intersectPos – planeCenter) = 0
射线方程 intersectPos = input.positionWS + t * input.viewDirWS
解 intersectPosWS
//虚拟液面
half3 planeCenter = float3(0.0, originPosWS.y + liquidHeightOS, 0.0);
half3 n = waveInfo.normal;
float3 intersectPosWS = input.positionWS + input.viewDirWS * dot(n, planeCenter - input.positionWS) / dot(n, input.viewDirWS);液面模拟水面张力
![图片[10]-【unity shader】复刻星穹铁道调酒效果 - 盘古CG网-盘古CG网](https://pic4.zhimg.com/v2-dda14f42a0572df375c53142ea3cb385_1440w.jpg)
- 法线
水和杯壁接触的部分会产生张力,张力有浸润和不浸润两种情况,但是玻璃材质的杯子一般是浸润的
计算液面边缘区域的遮罩,将遮罩范围内的液面法线和杯壁的法线做lerp就还原了张力影响的水面法线。但是,这里没有拿到真正的杯壁法线,而是计算了一个指向液面中心的虚拟杯壁法线。
float3 CalculateCylindricalNormal(float3 positionOS)
{
   float2 dirFromCenter = normalize(positionOS.xz);
   return normalize(float3(dirFromCenter.x, 0, dirFromCenter.y));
}
有无张力的对比图:
![图片[11]-【unity shader】复刻星穹铁道调酒效果 - 盘古CG网-盘古CG网](https://pic1.zhimg.com/v2-c7fd7ab214c4d525fde03826b2430234_1440w.jpg)
![图片[12]-【unity shader】复刻星穹铁道调酒效果 - 盘古CG网-盘古CG网](https://pic4.zhimg.com/v2-d74694e50ae282af8678d57ee9e6aa0d_1440w.jpg)
![图片[13]-【unity shader】复刻星穹铁道调酒效果 - 盘古CG网-盘古CG网](https://pic2.zhimg.com/v2-a832f65c18088b1bbb267cd6f53bc7c7_1440w.jpg)
![图片[14]-【unity shader】复刻星穹铁道调酒效果 - 盘古CG网-盘古CG网](https://pic1.zhimg.com/v2-a3cd7fcae30a97cd3b032ceed9f0f92a_1440w.jpg)
- 吃水线
因为张力会让水面抬升一定的高度,那么从侧面看过去,光线被这段抬升的高度折射,就形成了吃水线
// 吃水线
half waterlineMask = smoothstep(_WaterLineWidth, 0.0, clipPos) * saturate(dot(input.normalWS, nor
float2 screenUV = GetNormalizedScreenSpaceUV(input.positionCS);
float2 refractionUV = screenUV + waterlineMask * 0.3;
half3 waterlineCol = SampleSceneColor(refractionUV) * waterlineMask;
finalColor = lerp(finalColor, finalColor * 0.5, waterlineMask) + waterlineCol * (1.0 - alpha);
这里直接给屏幕uv加上遮罩做了一些扭曲,一点也不物理,但是效果好像还行
![图片[15]-【unity shader】复刻星穹铁道调酒效果 - 盘古CG网-盘古CG网](https://pic2.zhimg.com/v2-1f7881b27743c0c5d4e86d7589ff71b9_1440w.jpg)
![图片[16]-【unity shader】复刻星穹铁道调酒效果 - 盘古CG网-盘古CG网](https://pic4.zhimg.com/v2-2b7588b94228e9de08c31d05a2a1007d_1440w.jpg)
浮力模拟
初中浮力物理公式,直接放代码
// 计算波浪
waveAmplitude = bartendingManager.WaveAmplitude;
WaveInfo waveInfo = CalculateWave(relativePosition);
// 当前液面相对高度
liquidHeight01 = bartendingManager.LiquidHeight01;
liquidHeight = liquidHeight01 * maxLiquidHeight + waveInfo.height;
// F浮=液体的密度×体积×重力加速度
float bottomDepth = liquidHeight - relativePosition.y + centerToBottomOffset;
Vector3 buoyancy = buoyancyForceStrength * bottomDepth * bottomDepth * bottomDepth * -Physics.gravity.normalized;
buoyancy = Vector3.ClampMagnitude(buoyancy, maxBuoyancyForce);
rigidBody.AddForce(buoyancy, ForceMode.Acceleration);
// 添加阻力
rigidBody.AddTorque(-angularDrag * rigidBody.angularVelocity);
var forcePosition = rigidBody.worldCenterOfMass + 1f * Vector3.up;
rigidBody.AddForceAtPosition(drag.x * Vector3.Dot(transform.right, -rigidBody.velocity) * transform.right, forcePosition, ForceMode.Acceleration);
rigidBody.AddForceAtPosition(drag.y * Vector3.Dot(Vector3.up, -rigidBody.velocity) * Vector3.up, forcePosition, ForceMode.Acceleration);
rigidBody.AddForceAtPosition(drag.z * Vector3.Dot(transform.forward, -rigidBody.velocity) * transform.forward, forcePosition, ForceMode.Acceleration);
拟合了两种波形一种用来做倒酒时候的波浪一种做搅拌的波浪。
WaveInfo CalculateWave(float3 position)
        {
            WaveInfo waveInfo;
            float time = _Time.y * _WaveSpeed;
            float waveHeight = 0.0;
            if (_WaveType > 0.5)
            {
                waveHeight = _WaveAmplitude * 0.05 * sin(position.z * _WaveFrequency + time)
                             + _WaveAmplitude * 0.05 * sin(position.x * _WaveFrequency + time);
            }
            else
            {
                position.xz = Polar(position.xz);// 极坐标
                waveHeight = _WaveAmplitude * 0.05 * sin(position.x * PI * 3.0  + time);
            }
            float3 T = float3
            (
                1.0,
                _WaveAmplitude * 0.05 * _WaveFrequency * cos(position.x * _WaveFrequency + time)
                * _WaveAmplitude * 0.05 * sin(position.z * _WaveFrequency + time),
                0.0
            );
            float3 B = float3
            (
                0.0,
                _WaveAmplitude * 0.05 * _WaveFrequency * sin(position.x * _WaveFrequency + time)
                * _WaveAmplitude * 0.05 * cos(position.z * _WaveFrequency + time),
                1.0
            );
            float3 N = cross(B, T);
            float3 normal = normalize(N);
            waveInfo.normal = normal;
            waveInfo.height = waveHeight;
            return waveInfo;
        }
高度裁剪
首先,设置当前的最大高度_MaxLiquidHeight,和最大层数_MaxLayers。
然后,每次添加液体会传入一个_LiquidHeight01 参数到shader, _LiquidHeight01 是通过 当前层ID/MaxLayers 得到的,所以_LiquidHeight01 * _MaxLiquidHeight就是当前液面的高度。用这个高度截断相对坐标的y轴,再加上波形产生的高度就得到了需要裁剪的范围。
// 计算相对坐标
float3 originPosWS = TransformObjectToWorld(float3(0.0, 0.0, 0.0));
float3 relativePos = input.positionWS.xyz - originPosWS;
// 高度裁剪
float liquidHeightOS = _LiquidHeight01 * _MaxLiquidHeight + _LiquidHeightOffset;
float clipPos = liquidHeightOS - relativePos.y + waveInfo.height;
clip(clipPos);
层ID
这里要同时拿到currentID 和nextID 为之后做过渡做准备。
float liquidHeight0Max = relativePos.y / _MaxLiquidHeight * _MaxLayers;
uint currentID = floor(liquidHeight0Max - 0.5);
int nextID = min(_MaxLayers - 1, currentID + 1);
currentID:
![图片[17]-【unity shader】复刻星穹铁道调酒效果 - 盘古CG网-盘古CG网](https://pic4.zhimg.com/v2-40cb80e921fe4b6de53b75bb8cfe3997_1440w.jpg)
nextID:
![图片[18]-【unity shader】复刻星穹铁道调酒效果 - 盘古CG网-盘古CG网](https://pic2.zhimg.com/v2-bbbd129af4c814bc314e31425d1424c3_1440w.jpg)
用currentID和nextID采样数组中的颜色。
half4 currentColor = _LiquidLayerColor[currentID];
half4 nextColor = _LiquidLayerColor[nextID];
currentColor:
![图片[19]-【unity shader】复刻星穹铁道调酒效果 - 盘古CG网-盘古CG网](https://picx.zhimg.com/v2-b70d9af1a702b9acff81f23b0d1afc9d_1440w.jpg)
nextColor:
![图片[20]-【unity shader】复刻星穹铁道调酒效果 - 盘古CG网-盘古CG网](https://pic2.zhimg.com/v2-660c5e18459c8fa037e830a5e4d40651_1440w.jpg)
层过渡
这里用nextID计算出了位于每层中间位置的一个渐变遮罩。
half lerp01 = smoothstep(nextID - lerpRange, nextID + lerpRange, liquidHeight0Max);
half layerWarpMask = 1.0 - abs(lerp01 - 0.5) * 2.0;![图片[21]-【unity shader】复刻星穹铁道调酒效果 - 盘古CG网-盘古CG网](https://pic2.zhimg.com/v2-6d7328a652f5ef8be7882d2bd7cad755_1440w.jpg)
用这个遮罩lerp currentColor和nextColor就得到了混合后的颜色
![图片[22]-【unity shader】复刻星穹铁道调酒效果 - 盘古CG网-盘古CG网](https://picx.zhimg.com/v2-c474436480070b41056df1b90faa60df_1440w.jpg)
可以看到这里每层的混合方式好像不太一样,最上层紫色混合处有很多扰动,这是因为每层过渡都有单独的Warp参数,由每层液体的配置文件决定。
// 添加扰动的版本
half lerpRange = _LiquidLayerLerpRange[nextID];
half lerp01 = smoothstep(nextID - lerpRange, nextID + lerpRange, liquidHeight0Max);
half lerpWarpInt = _LerpWarpInt[nextID];
half lerpWarpSize = _LerpWarpSize[nextID];
half layerWarpMask = 1.0 - abs(lerp01 - 0.5) * 2.0;
half lerpNoise = SAMPLE_TEXTURE2D(_LerpNoise, sampler_LerpNoise, input.uv * lerpWarpSize * _LayerWarpSize).r;
lerp01 = lerp01 + (lerpNoise - 0.5) * lerpWarpInt * layerWarpMask;![图片[23]-【unity shader】复刻星穹铁道调酒效果 - 盘古CG网-盘古CG网](https://pic1.zhimg.com/v2-fc46d4a67abdd754582fce89bf017658_1440w.jpg)
这里只写了颜色,其他的遮罩,气泡…都是同理。
异步动画
以搅拌动画为例,计算动画前先计算好各个动画参数的平均值作为目标值。
 // 计算平均值
 int blendCount = currentLayer - 1;// 需要混合的层数
 Color averageColor = Color.clear;
 float averageBubbleInt = 0;
 for (int i = 0; i <= blendCount; i++)
 {
 averageColor += layerColors[i];
 averageBubbleInt += bubbleInt[i];
 }
 averageColor /= currentLayer;
 averageBubbleInt /= currentLayer;
 int count = blendCount == 4 ? blendCount : currentLayer; // 要改变上面两层颜色
 RenderTexture averageMask = BartendingAnimation.AverageMask(layerMaskTexArray, count);
 float averagelayerLerp = 0.6f;
 // 切换波浪动画
 waveType = 0;
使用UniTask实现异步,混合一些参数时用返回值time根据各个部分的动画曲线更新相应的参数,混合mask则是直接在异步方法中使用cs计算了混合后的mask。
// 混合渐变动画
UniTask blendTask =  BartendingAnimation.AnimationTimerAsync(
 liquidBlendDuration,
    (float time) =>
    {
 for (int i = 0; i <= count; i++)
        {
            // 混合颜色
 layerColors[i] = Color.Lerp(layerColorTarget[i], averageColor, blendColorCurve.Evaluate(time));
            // 混合泡沫强度
 bubbleInt[i] = Mathf.Lerp(bubbleIntTarget[i], averageBubbleInt, blendBubbleCurve.Evaluate(time));
            // 增加lerp范围
 layerLerps[i] = Mathf.Lerp(layerLerpsTarget[i], averagelayerLerp, blendlerpCurve.Evaluate(time));
 shaderNeedUpdate = true;
        }
        // 波浪动画
 waveAmplitude = blendWarpCurve.Evaluate(time);
        // UV动画 (在上次的uv偏移基础上累加)
 uvOffest.x = preUvOffest.x + blendUVCurve.Evaluate(time);
 uvOffest.y = preUvOffest.y + blendUVCurve.Evaluate(time);
    }
);
// 混合mask
UniTask blendMaskTask = BartendingAnimation.MaskAnimationAsync(
 liquidBlendDuration,
 layerMaskTexArray,
    (RenderTexture mask) => {
 layerMaskTexArray = mask;
 shaderNeedUpdate = true;
    }
 ,blendMaskCurve
);
编辑器中的动画曲线:
![图片[25]-【unity shader】复刻星穹铁道调酒效果 - 盘古CG网-盘古CG网](https://picx.zhimg.com/v2-90ff5a645c5320b04e257504b77c9d91_1440w.jpg)
总结
平面方程不能很好的模拟液体波动比较大时的水面,更精致的模拟可以用raymarching?


暂无评论内容